Blog Posts
Aplikasi Tempat Kursus - Coursena
Aplikasi Coursena merupakan aplikasi manajemen kursus untuk instansi tempat kursus, seperti kursus bahasa inggris, kursus komputer atau kursus memasak dengan fitur yang lengkap dan dapat digunakan secara multi user. Fitur meliputi: Master data user/operator Master data member kursus Master data pegawai kursus Master data paket kursus Master data kelas kursus Master data asrama Master data harga Master data periode masuk Master data durasi Master data jenis pembayaran Master data jenis pengeluaran Transaksi registrasi kursus Daftar transaksi pembayaran Daftar transaksi pemasukan Daftar transaksi pengeluaran Laporan cashflow Grafik Penjualan Bulanan Grafik Penjualan Tahunan Laporan Pembayaran Laporan Pemasukan Laporan Pengeluaran Kwitansi pembayan Setting identitas instansi Backup Restore Screenshot
Restopos Subscription
Please enter your email address and Serial No of your application then click Buy Now button to purchase the license using Paypal. We will send you the license key to your email in 24 hours after your payment. Email Serial No
Kemungkinan Kerentanan 0 Day Microsoft Exchange Menyebabkan Salah Satu Peretasan Terbesar Yang Pernah Terjadi Di Inggris
Nampaknya semakin jelas bahwa kerentanan Zero Day yang kritis yang tidak diperbaiki selama lebih dari sebulan dalam Microsoft Exchange adalah penyebab salah satu peretasan terbesar yang pernah terjadi di Inggris - peretasan terhadap Komisi Pemilihan negara itu, yang mengakibatkan data hingga 40 juta penduduk terbuka. Pejabat Komisi Pemilihan mengungkapkan peretasan tersebut pada hari Selasa. Mereka mengatakan bahwa mereka menemukan intrusi tersebut pada bulan Oktober tahun lalu ketika mereka menemukan “aktivitas mencurigakan” di jaringan mereka dan bahwa “pelaku yang bermaksud jahat pertama kali mengakses sistem pada Agustus 2021.
How to download full website using Wget
Are you struggling to download a website to your local computer? Try this simple command and you will surprised how easy to download a full website using Wget. wget --recursive --convert-links --backup-converted --page-requisites --level=inf --adjust-extension -U "Mozilla/4.0 (compatible; MSIE 6.0; Windows NT 5.1; SV1)" -p --mirror --html-extension --convert-links https://somedomain.org/ GNU Wget is a free software package for retrieving files using HTTP, HTTPS, FTP and FTPS, the most widely used Internet protocols.
Mata Kuliah
Menu mata kuliah berisi halaman Mata kuliah dan paket mata kuliah. 5.1. Mata Kuliah Halaman Mata Kuliah (Gambar 5.1.) berfungsi sebagai tempat mengatur semua mata kuliah yang ada pada universitas. Gambar 5.1. Halaman Daftar Mata Kuliah Untuk menambah mata kuliah tekan tombol Tambah Mata Kuliah kemudian akan muncul halaman seperti gambar 5.1. Masukkan Kode Mata Kuliah, Nama Mata Kuliah, SKS Mata Kuliah, Jenis Mata Kuliah, Kelompok Mata Kuliah. Field lainnya adalah opsional dan boleh dikosongi.
Kalendar
Menu kalender berisi halaman kalender akademik dan update term berjalan. 4.1. Kalender Akademik Halaman Kalender Akademik (Gambar 4.1.) berfungsi sebagai tempat untuk mengatur jadwal kegiatan yang ada pada universitas. Kegiatan akademik yang perlu dimasukkan tiap semester adalah: Registrasi Mahasiswa Baru Masa Pengisian IRS Masa Perubahan IRS Gambar 4.1. Halaman Kalender Akademik Untuk menambah kegiatan baru tekan tombol Tambah Kegiatan kemudian akan muncul halaman Tambah Kegiatan seperti gambar 4.2. Pada halaman Tambah Kegiatan :
Master Data
Menu master data berisi sekumpulan halaman yang mengatur data-data yang sifatnya mendasar dan digunakan pada seluruh bagian aplikasi sistem informasi akademik. Berikut akan dijelaskan tiap halaman secara mendetail. 3.1. Fakultas Halaman daftar fakultas (Gambar 3.1.) berfungsi untuk menambah atau mengubah fakultas yang ada di universitas. Pada kolom Action pengguna bisa mengklik tombol lihat detail, edit atau hapus fakultas yang ada. Gambar 3.1. Halaman Daftar Fakultas Untuk menambah fakultas tekan tombol Tambah Fakultas pada toolbar kemudian akan muncul tampilan Gambar 3.
Halaman Dashboard
Gambar 3.1. Halaman Dashboard Halaman Dashboard adalah halaman pertama yang dapat diakses setelah anda berhasil login ke dalam sistem informasi akademik ini (Gambar 3.1.). Pada halaman Dashboard terdapat beberapa link untuk mempercepat pengaturan dalam universitas yang diantaranya adalah: Update Detail Universitas Tambah Fakultas Tambah Program Studi Tambah Semester Update Term Berjalan Tambah Kurikulum Tambah Mata Kuliah Tambah Staff / Dosen Tambah Kelas Mata Kuliah Tambah Paket Kelas Mata Kuliah Tambah Event Akademik Tambah Pembimbing Akademik Pada bagian pojok kanan atas terdapat informasi semester yang sedang aktif dan pada footer terdapat link untuk melaporkan apabila terjadi gangguan atau mengirim saran kepada admin situs.
Halaman Login
Gambar 2.1. Halaman Login Sebelum masuk ke dalam Sistem informasi akademik ini admin harus login lewat alamat http://namadomain.com/admin/login. Kemudian masukkan username dan password pada form Login Admin (Gambar 2.1.). Username yang dipakai berupa email. Apabila anda berhasil login anda akan masuk ke halaman Dashboard (Gambar 3.1.) Apabila anda lupa password anda dapat menekan link forgot your password? Yang berada di bawah tombol Login. Kemudian pada halaman Forgot Password (Gambar 2.2.) masukkan email dan tekan tombol Kirim kemudian sistem akan mengirim link untuk mereset password anda ke email yang telah anda masukkan tadi.
Amelaris – Sistem Informasi Akademik untuk Universitas
SIAKAD Sistem Informasi Akademik[][1]Siakad Online Amelaris adalah Sistem informasi akademik yang berfungsi untuk membantu mengatur kegiatan akademis di universitas mulai dari pendaftaran mahasiswa, pembuatan kurikulum, pengisian IRS, mengatur kegiatan perkuliahan, hingga pembuatan transkrip nilai. Untuk dapat menggunakan sistem informasi akademik ini diperlukan koneksi internet. Sistem Informasi ini dibagi menjadi beberapa modul: Modul Admin Daftar Program Studi Module ini dibuat untuk mengatur semua fungsi dari sistem informasi ini, mulai dari master data hingga laporan. Hanya user admin yang menginstall sistem ini yang bisa masuk ke modul operator.
Menu Penjualan dalam RestoPOS
Penjualan Makan Ditempat Menambah Pesanan Untuk memulai penjualan makan ditempat ikuti langkah-langkah berikut: Klik Menu Sales > Dine kemudian akan muncul tabel Dine. Pilih meja yang kosong (Status : Empty) kemudian tekan Add New Order atau F12 untuk menambah pesanan kemudian akan muncul tampilan form Dine – Add a new order seperti dibawah Klik Add Menu atau F12 untuk menambah menu kedalam pesanan. Kemudian akan muncul tampilan Select Menu Form seperti dibawah ini
Subscription
Please enter your email address and Serial No of your application then click Buy Now button to purchase the license using Paypal. We will send you the license key to your email in 24 hours after your payment. Email Serial No
Registrasi Aplikasi
Point Of Sales Program Kasir Program Restoran Program Toko Sistem informasiSilahkan isi form dibawah ini dan kami akan mengirim link pembayaran ke email anda. Loading…
Download Aplikasi Gratis
Point Of Sales Program Kasir Program Restoran Program Toko Sistem informasiHow to Manually Upgrade Joomla! 2.5, 3.0, 3.1, 3.2 or 3.3 to Joomla! 3.4
It is important to make your Joomla websites running on the latest Joomla version. Indeed Joomla already have auto update feature like on WordPress but sometimes you need to upgrade it manually on your local computer and then check all the pages and make sure everything is working. So here are the steps to upgrade your Joomla manually: Backup your Joomla! website (files and database) Go to Joomla release page https://github.
Program Restoran – Resto POS – Menambah Item
Untuk menambah item pada aplikasi client Resto POS ikutilah langkah-langkah berikut ini Dari menu Master Data klik Item atau bisa lewat shortcut ALT+I Kemudian klik tombol Add atau lewat shortcut F12 untuk menambah Item baru dan akan muncul Item Form Keterangan: Tipe : untuk menentukan tipe dari item yang akan dijual Stock/Inventory atau Menu/Service Kode : kode dari item yang akan dijual Nama : nama dari item yang akan dijual Jenis : jenis item yang akan dijual Satuan : satuan dari item yang akan dijual Harga Beli : harga beli dari item yang akan dijual Harga Jual Lokal : harga jual lokal dari item yang akan dijual Notes : keterangan untuk item yang akan dijual Gabungan : centang checkbox jika item yang akan dijual ini adalah item gabungan Kemudian klik tombol Save Apabila anda mencentang checkbox Gabungan maka
Program Restoran – Resto POS – Mengatur Hak Akses User Baru
Pada tutorial sebelumnya kita telah membuat satu user baru dengan username: anderson dengan user group kasir. Hak akses dalam aplikasi RestoPOS ini diatur berdasarkan user group. Sekarang kita akan mengatur hak akses untuk user group kasir. Misalkan user grup kasir hanya diperbolehkan untuk membuat transaksi penjualan makan ditempat saja (Penjualan > Makan Ditempat). Dari menu Master Data klik User Access kemudian anda akan masuk userlist Setelah itu pilih Kasir dari combo box Group Setelah itu pilih Penjualan dari panel kiri<br/ >
Program Restoran – Resto POS – Membuat User Baru
Untuk membuat user baru di dalam aplikasi RestoPOS ini ikutilah langkah-langkah berikut ini. Cara membuat user baru: Dari menu Master Data klik User atau bisa dengan shortcut ALT+U kemudian anda akan masuk ke User list Untuk menambah user klik tombol Add atau lewat shortcut F12 setelah itu akan muncul form berikut Isi semua field dan pilih user group untuk user baru ini kemudian klik tombol Save Setelah selesai anda akan melihat user tadi di user list
Program Restoran – Resto POS – Initial Data
Setelah berhasil menginstal aplikasi database server dan aplikasi client
Resto POS maka selanjutnya yang perlu dilakukan adalah mensetting aplikasi
client, mengisi master data serta data perusahaan.
Mensetting Aplikasi Client dan Menginstal Initial Data
Setelah berhasil menginstal aplikasi client maka silahkan jalankan aplikasi
client dari start menu: AldoApp Resto POS > RestoPOS
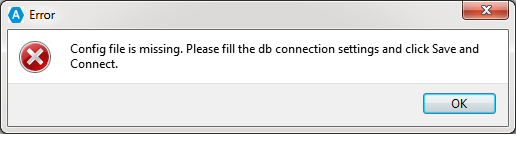
Pada saat pertama kali dijalankan aplikasi client ini akan mengecek
apakah config file sudah ada atau belum. Config file ini diperlukan untuk
menghubungkan aplikasi client dengan database server. Saat ini config file
belum ada sehingga aplikasi client menampilkan pesan error tersebut. Sekarang kita
perlu mensetting koneksi database lewat dialog config dibawah ini.
Program Restoran – Resto POS – Instalasi
Point Of Sales Program Kasir Program Restoran Program Toko Sistem informasi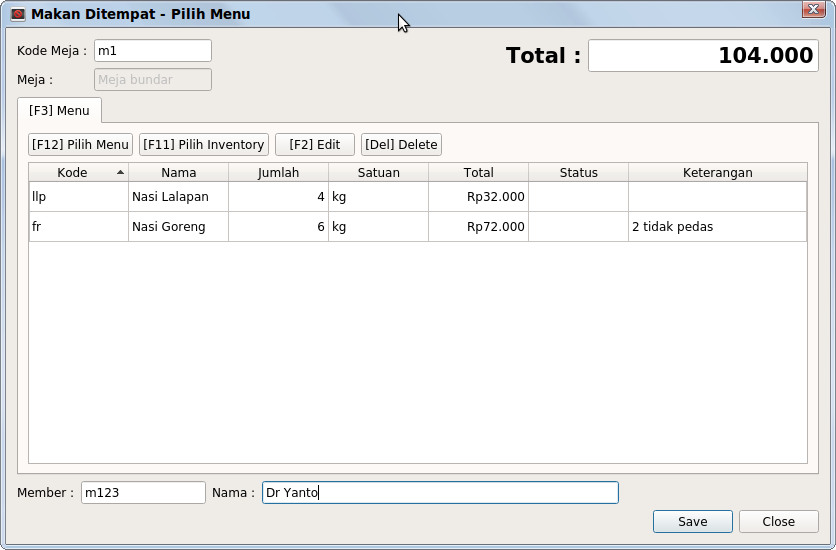
Resto POS adalah sebuah sistem informasi atau program untuk membantu dalam pengelolaan rumah makan atau depot atau bahkan toko biasa. Resto POS ini adalah gabungan dari program kasir atau Point of Sales dan manajemen restoran.
Resto POS ini terdiri atas dua aplikasi utama yaitu: pertama database server dan yang kedua adalah aplikasi client. Untuk memasang program Resto POS ini di komputer anda terlebih dahulu anda harus mendownload installer database servernya dari
http://aldoapp.com/RestoDBSetup.exe
dan juga mendownload installer aplikasi client dari http://aldoapp.com/RestoPOSSetup.exe. Setelah berhasil mendownload kedua installer tersebut kemudian ikuti langkah berikut:
Program Restoran – Resto POS
Point Of Sales Program Kasir Program Restoran Program Toko Sistem informasiResto POS adalah sebuah sistem informasi atau program untuk membantu dalam pengelolaan rumah makan atau depot atau bahkan toko biasa. Resto POS ini adalah gabungan dari program kasir atau Point of Sales dan manajemen restoran. Download Resto POS 2017 Fitur Utama: Master Data User User Group User Access Perusahaan Jenis Item Satuan Meja Akun Kas / Bank Supplier Member Agen Karyawan Item Kartu Stok Persediaan Stok Awal / Beginning Balances Stok Opname / Inventory Adjustment Pembelian Pesanan Pembelian / Purchase Order Pembelian / Receive Inventory Retur Pembelian / Credit Note Pembayaran / Payments Penjualan Makan Ditempat Fast Food Bawa Pulang Pesanan Masuk Daftar Penjualan Piutang Daftar Komisi Agen Daftar Pembayaran Komisi Agen Kas Arus Kas Transfer Reports Master Data Daftar Item Daftar Supplier Configuration General Running Numbers Printer Kasir Dapur Help Selanjutnya: Instalasi Program Restoran – Resto POS
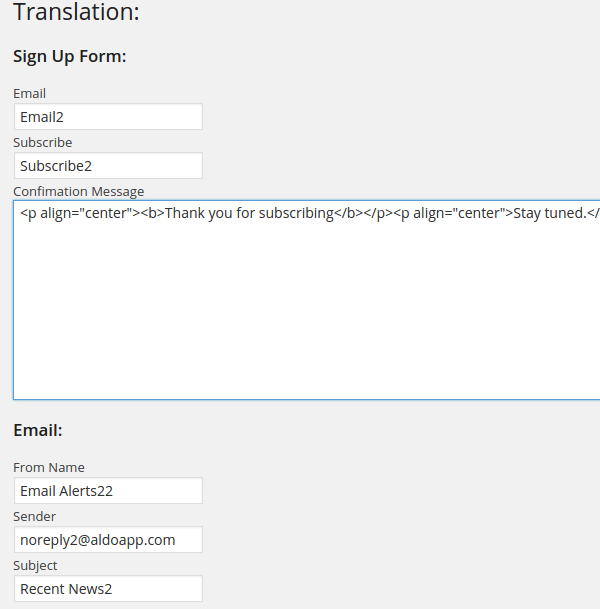
WordPress Plugin: Email Alert Scheduler
If you are looking for a very simple Email Alert Scheduler for WordPress then you should try this simple plugin: WordPress Plugin: Email Alert Scheduler our you can clone it from https://github.com/araneta/Schedule-PR. This plug in will allows you to send messages to your subscribers at a specified time. You can use this plug in for Press Release. Here are the steps to create an email alert:
1. Add a new Schedule
To add a new schedule, first you have to login to WordPress backend and go to Schedule Email Alert > Schedule Entry. On Add Schedule page enter : Subject, Message and Schedule Time. This message will be sent to subscriber emails at the Scheduled time.
Joomla: Folders that need to be writable
Do you have a fresh Joomla installation? If yes then you should set the permission of these folders to be writable by your web server before you can install any Joomla extension. You can see the list of folders that need to be writable from this page: System > System Information > Directory Permissions, make sure the status of all these folders are writable. administrator/components administrator/language administrator/language/bg-BG administrator/language/da-DK administrator/language/nl-NL administrator/language/ja-JP administrator/language/hr-HR administrator/language/en-GB administrator/language/es-ES administrator/language/el-GR administrator/language/pt-BR administrator/language/de-DE administrator/language/overrides administrator/language/pl-PL administrator/language/ru-RU administrator/language/fr-FR administrator/language/it-IT administrator/manifests/files administrator/manifests/packages administrator/manifests/libraries administrator/modules administrator/templates components images images/jsn_is_thumbs images/content images/headers images/stories images/sampledata images/extensions images/cliparts images/banners language language/en-GB language/overrides libraries media modules plugins plugins/jsnimageshow plugins/search plugins/content plugins/extension plugins/system plugins/editors plugins/jsnpoweradmin plugins/editors-xtd plugins/quickicon plugins/user plugins/twofactorauth plugins/authentication plugins/captcha plugins/finder templates configuration.
Autopost: Schedule Facebook and Twitter Updates
Autopost is a web application using Codeigniter framework and Twitter bootstrap. Here are some of its features: <div class="desc"> <h4> Simple </h4> <p> Schedule tweets and Facebook updates in one application </p></p> </div></p> </div></p> </div> <div class="col-md-4"> <div class="clearfix"> <i class="fa fa-globe"></i></p> <div class="desc"> <h4> Across Time Zones </h4> <p> Fbtweetbot allows you to post messages in different timezone easily </p></p> </div></p> </div></p> </div> <div class="col-md-4"> <div class="clearfix"> <i class="fa fa-picture-o"></i></p> <div class="desc"> <h4> Image </h4> <p> Post messages to Facebook and twitter accounts with an image or link.
Drupal : Creating Form with Drag and Drop Ordering

So you want to create a form with drag and drop ordering in Drupal 7? Here are 3 simple steps to create a form with drag and drop ordering:
1. Implement hook_menu, to register the URL of the form
function module_name_menu() {
	$items = array();
	$items['admin/config/content/module_name/manage'] = array(
		'title' => 'Recent News: List Links',
		'page callback' => 'drupal_get_form',
		'page arguments' => array('module_name_manage'),
		'access arguments' => array('access administration pages'),
  	);
}
Upgrading Joomla 3.2.x to 3.2.4
Today I tried to upgrade my local Joomla site from Joomla 3.2.1 to Joomla 3.2.4 using Joomla_3.2.x_to_3.2.4-Stable-Patch_Package.zip and Voilà I got this error message on my Joomla admin page: Fatal error: Class ‘FOFUtilsObject’ not found in /joomlapath/libraries/fof/model/model.php on line 23. Then I tried to open the Joomla admin page using different browser and I got the Joomla: An error has occurred error message. So I try to fix this error using the technique described in my previous post and I know the source of the problem is :
Using Fontawesome icon on Joomla backend
Font Awesome gives us FREE scalable vector icons for our websites. In this article I will show you how to use it in Joomla back end of your component.
Troubleshooting Joomla: An error has occurred.
As you know Joomla has a bad error reporting. One of the most frustrating error message is ‘An error has occurred.’ followed by some error code like 1146. In this tutorial we will update Joomla’s core file so that it will show a more informative error messages instead of just error code.

Drupal: Installing CKEditor, WYSIWYG Module and Media Module
As you know WordPress has a nice Media Library which allows you to upload images, crop them and create thumbnails. But you can’t find this feature on Drupal. In this tutorial we will try to install WYSIWYG module and Media module to create a Media Library just like on WordPress. Here are the steps:

How To Use JHtmlSidebar::addFilter
If you are developing Joomla 3.x components you should familiar with this code: JHtmlSidebar::addFilter( JText::_('JOPTION_SELECT_PUBLISHED'), 'filter_published', JHtml::_('select.options', JHtml::_('jgrid.publishedOptions'), "value", "text", $this->state->get('filter.state'), true) ); This code will create a drop down list to filter the items based on their state. This JHtmlJGrid is defined on /joomlapath/libraries/cms/html/jgrid.php and you can see the available options on jgrid.publishedOptions function. Here are the complete list: $options[] = JHtml::_('select.option', '1', 'JPUBLISHED'); $options[] = JHtml::_('select.option', '0', 'JUNPUBLISHED'); $options[] = JHtml::_('select.
How to do test driven development for Joomla Component: Part 2
Test driven develomentIn the last tutorial we have created a unit test for the back end or administrator part of Joomla component and in this tutorial we will create a unit test for the front end or public part of Joomla component. In this tutorial we will use Joomla 3.2.x and Joomla article component (com_content) for experiment. So let’s start
1. Create a Test folder
Create a new folder called Tests on /joomlapath/components/com_content folder. This folder will contain all test files for com_content component.
2. Create phpunit configuration file
Create a new file called phpunit.xml in Tests folder. We will use the following configurations for this experiment:
<phpunit bootstrap="bootstrap.php"
    colors="true"
    convertErrorsToExceptions="true"
    convertNoticesToExceptions="true"
    convertWarningsToExceptions="true"
    processIsolation="false"
    stopOnFailure="false"
    syntaxCheck="false"
    verbose="true">
</phpunit>
How to do test driven develoment for Joomla components
TDD TDD Joomla component Test driven develomentTest Driven Development is very important to improve quality and reduces bugs in your code. In this article I will show you how to use TDD in developing Joomla component. First you have to install phpunit, you can find the details at here. In this article we will use Joomla article manager (com_content) component as an experiment, and this article is based on Joomla 3.2.0. Here are the steps:
1. Create a Test folder
Create a new folder called Tests on /joomlapath/administrator/components/com_content folder. This folder will contain all test files.
2. Create phpunit configuration file
Create a new file called phpunit.xml. we will use the following configurations for this experiment:
<phpunit bootstrap="bootstrap.php"
	colors="true"
	convertErrorsToExceptions="true"
	convertNoticesToExceptions="true"
	convertWarningsToExceptions="true"
	processIsolation="false"
	stopOnFailure="false"
	syntaxCheck="false"
	verbose="true">
</phpunit>
Fixing Warning: require_once(Cache/Lite.php): failed to open stream
I got this error message when upgrading my joomla site to joomla 2.5. Warning: require_once(Cache/Lite.php): failed to open stream: No such file or directory in joomlapath/libraries/joomla/cache/storage/cachelite.php on line 75 Fatal error: require_once(): Failed opening required 'Cache/Lite.php' (include_path='.:/usr/share/php:/usr/share/pear') in joomlapath/libraries/joomla/cache/storage/cachelite.php on line 75 The source of this problem is in my configuration.php public $smtpsecure = 'none'; public $smtpport = '25'; public $caching = '0'; public $cache_handler = 'cachelite'; public $cachetime = '15'; public $MetaDesc = ''; public $MetaKeys = ''; public $MetaTitle = '1'; public $MetaAuthor = '1'; public $robots = ''; so the solution is simple, just remove the ‘cachelite’ from $cache_handler variable 🙂
How to put a block inside an article in Drupal
As a Joomla developer I usually put a module inside an article using loadposition code. The code is pretty simple: {loadposition position_name}, but I can’t find this functionality in Drupal 7, I don’t know how to put a block inside an article in Drupal. So I ended adding this code to the page.tpl.php in my template.
$node = menu_get_object();
$nid = $node->nid;
$body = $page['content']['system_main']['nodes'][$nid]['body'];
$content = $body['#object']->body['und'][0]['value'];
$argument_keys=null;
if (preg_match_all("/{loadposition ([\w-]+)}/", $content, $argument_keys)) {
	$region = $argument_keys[1][0];
	$region_name = block_get_blocks_by_region($region);
	$added_string = render($region_name);
	$newcontent = str_replace($argument_keys[0],$added_string,$content);
}

if($newcontent==NULL)
	print render($page['content']);
else
	print $newcontent;
Joomla Template Overrides Methods
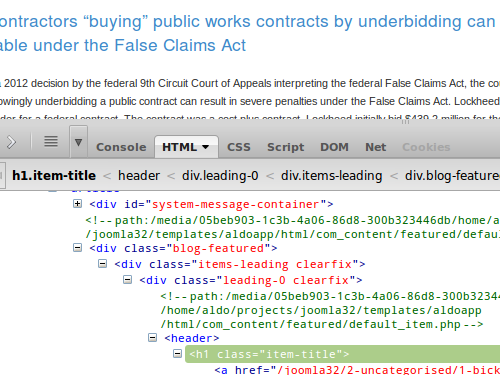
Joomla template Overrides is difficult, even for joomla expert. As a joomla developer may be you already knew how to find the correct file to override the layout of Joomla components or modules. In this tutorial I will show you some methods to find the correct file to override the Joomla components or modules layout.

Installing WordPress in Drupal’s sub directory
Last week one of my clients asked me to move her blog which is using wordpress to a new server under Drupal sub directory. So for example the main website is www.mywebsite.com and this main site is using Drupal and I have to setup wordpress under blog directory or www.mywebsite.com/blog/. As you know that Drupal htaccess file will intercept all requests to the main site and that will cause some problems to the wordpress site. Then what should we do is:
Removing Mootools and JCaption code in Joomla
As you know that Joomla will automatically includes Mootools library and some unneeded javascript to every page of your site, you might already familiar with this line of code:
<script src="../media/system/js/mootools-core.js" type="text/javascript"></script>
  <script src="../media/system/js/core.js" type="text/javascript"></script>
  <script src="../media/system/js/caption.js" type="text/javascript"></script>
  <script type="text/javascript">
window.addEvent('load', function() {
				new JCaption('img.caption');
			});
  </script>
Creating Article Lightbox Module
Today I will show you how to create a joomla module which shows an article inside a lightbox. I will call this module mod_article_lightbox. First you need to download superbox package file from http://pierrebertet.net/projects/jquery_superbox/ then please follow these steps: create a folder inside your joomla module folder named mod_article_lightbox create a file named mod_article_lightbox.xml you can see /modules/mod_custom/mod_custom.xml for a reference the important thing of mod_custom.xml file are fields tag.
a must have Joomla code snippet
As a programmer I don’t have a good memories that’s why I have to read this Joomla code snippet when creating or updating joomla templates get current (absolute) url: <pre class="brush:php">$uri = &JURI::getInstance(); $myabsoluteurl = $uri->toString(array(‘path’)); get article by article id: <pre class="brush:php">$db = &JFactory::getDBO(); $sql = “SELECT introtext FROM #__content WHERE id = “.intval($articleId); $db->setQuery($sql); $fullArticle = $db->loadResult(); if(!strlen(trim($fullArticle))) $fullArticle = “Article is empty “; add js file to head of the template: <pre class="brush:php">$host = JURI::root(); $document =& JFactory::getDocument(); $document->addScript($host.
How to Access Domain Name without WWW prefix
Can’t access your domain without www prefix? this is a common problem when you change the cname record of your website to different server. this problem is called ‘Naked Domain’ problem. in this tutorial I will show you how to fix this problem. 1. Forward or Mask your domain If you are using godaddy.com as a registrar then you can Forward or Mask your domain to fix this naked domain problem.